آموزش فارسی روتوش فتوشاپ : مثال های عملی ابزار Diffusion control
آموزش اصلاح پس زمینه بگراند فتوشاپ Diffusion control
در این ویدئو آموزشی فتوشاپ سی سی به زبان فارسی ، میخواهم یک ابزار فوق العاده برای اصلاح پس زمینه که در خیلی از شرایط و محیط های کاری مختلف، به خود من خیلی کمک میکند را به شما معرفی کنم.در این آموزش ، میخوام این ابزار را در چند جای مختلف برای شما مثال بزنم تا کاربرد آن را مکان درست خودش یاد بگیرید.
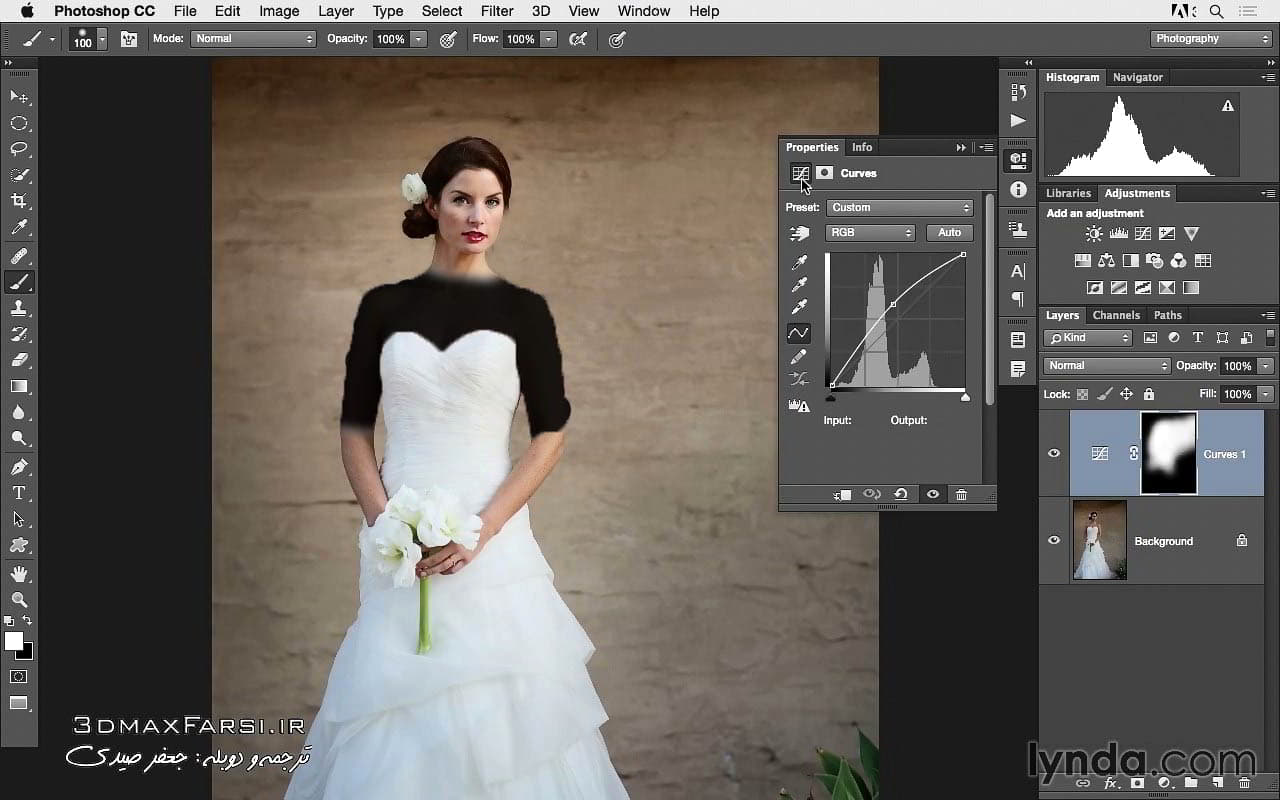
در مثال اول، میخوام این گیاهی را در تصویر بالای صفحه می بینید را حذف کنم.برای اینکار، اگر سطح وسیعی را داشتید، بهتر است که از ابزار پچ فتوشاپ patch tool photoshop استفاده کنید. و به شما نشان خواهم داد که از چه مقادیری برای Diffusion control در شرایط مختلف استفاده کنید.
در مثال دوم که بگراند ما کمی پیچیده تر هست ، و به شما نشان خواهم داد که این ابزارها برای ما جادو نمیکنند و شما باید بتوانید روی آنها ، هوشمندانه کار کنید.بهرحال وقتی بخواید قسمتی را بگراند را حذف کنید، میتوانید از پیش زمینه هم استفاده کنید که کار روتوش شما، تمیز تر و زیباتر به نظر برسد …
فیلم آموزشی : Photoshop video tutorials
پخش آنلاین آموزش : 4 دقیقه : جعفر صیدی
سایر آموزش ها و پکیج های حرفه ای ادیت و روتوش فتوشاپ : جعفر صیدی
In my own workflow, I found this new feature to be really helpful in a wide range of situations and because of that what I want to do is just show you a couple of workflow scenarios of how you might use this feature just to get you thinking about how you can integrate it into your workflow. So we’ll start off with this image here, and let’s say that with this image what we want to do is get rid of this plant in the lower area of the photograph. Well a lot of times when you’re retouching what I like to do is to zoom in on the area and then think about which tool will work best. If it’s a large area, I like to work with the patch tool. Here I’ll have the patch tool on source, and just for demo purposes let’s see what it would look like on a low value. And the way that I’ll do this is I’ll just click and drag roughly around the object that I want to get rid of. And you can see I’m just making my way around this being careful in some areas and not quite so careful in others. I’m trying to get kind of close to the dress down there,
and then make my way over and around here. Now with this what we can then do, of course, is we can click and drag this up to a source area and then let go. Now if I hide the edges for a moment, what we’ll see is if we look really closely you can just kind of define the edges and it doesn’t look very good at all. So what we need to do, of course, is have a different diffusion value. So here I’ll crank this up to a higher value. I’ll drag this up to the same exact source area, and this time I’ll go ahead and hide those edges. And here you can see it just looks really perfect. I mean the blending looks so good in that area. And often what I’ll do is after I’ve retouched an area away like that is continue to work with this tool with this higher value. I’ll go ahead and sample or click and drag around these areas and drag it to source areas to retouch other issues away. And that’s often how we’ll work with this tool where you just go ahead and drag around an area and then bring it to a good source area. And this works with small little blemishes like these here, or perhaps we have a bigger one. This wood beam up top we could go ahead and just make a selection of that, and then, of course, drag that down to a new area. In this case you can see with that higher diffusion value it just speeds up the workflow and it helps us to accomplish better results really quickly. And it doesn’t always mean that you’re going to need to have a high diffusion value, but it really does help with those edges, again, whether we’re working on a little detail of a shadow underneath an eye like in the previous movie, or larger objects like you can see here. All right, well let me show you one more image in another workflow scenario. In this photograph, you can see I have a slower shutter speed so I kind of have this nice motion. One surfer here, another one on a wave in the foreground which I want to get rid of. If we zoom in on that area, you can see it’s actually kind of complicated because the water is moving in so many different ways. And so I know from experience that when it gets really complicated the patch tool doesn’t tend to work super well so I like to use more specific tools say like the healing brush. Now with the healing brush, if we try a diffusion value of one, I’ll go ahead and sample by option or alt clicking and paint over this. What we’ll see is that it will get rid of the object, but we’re just going to kind of have these almost like bubbled edges. So if I zoom in on that you can see them there, right? It isn’t very good. It’s just not going to cut it. It kind of looks amateur. So here if we go back, of course, as you’ve started to see, we’ll bring this value up and we’ll make very similar adjustments over this, and here I’m just making the same exact brushstrokes here but now I’m able to accomplish just a ton better results. And I might need to come in from either side, you know, and kind of bring in some texture in some different areas, and the reason I wanted to say that and kind of show this is that is isn’t a magic bullet feature. It doesn’t work perfectly every time. You still need to kind of work at it. But as you can see in these two examples whether it’s a photograph we’re removing a background element, or something in the foreground like we have here, this can really help us to have much more seamless and much more beautiful retouching.


