آموزش فارسی روتوش صورت با فتوشاپ : Retouching Diffusion control
آموزش فارسی اصلاح و روتوش بهتر با ابزار Diffusion control
در این ویدئو آموزشی رایگان فتوشاپ به زبان فارسی ، میخوام یک ویژگی مهم و فوق العاده را به شما معرفی کنم که به شما کمک میکنه تا حتی روتوش های خیلی بهتری را انجام بدید.حالا میتواند روتوش کردن منظرهای لنداسکیپ، پورتره یا هر تصویر دیگری میتواند باشد.
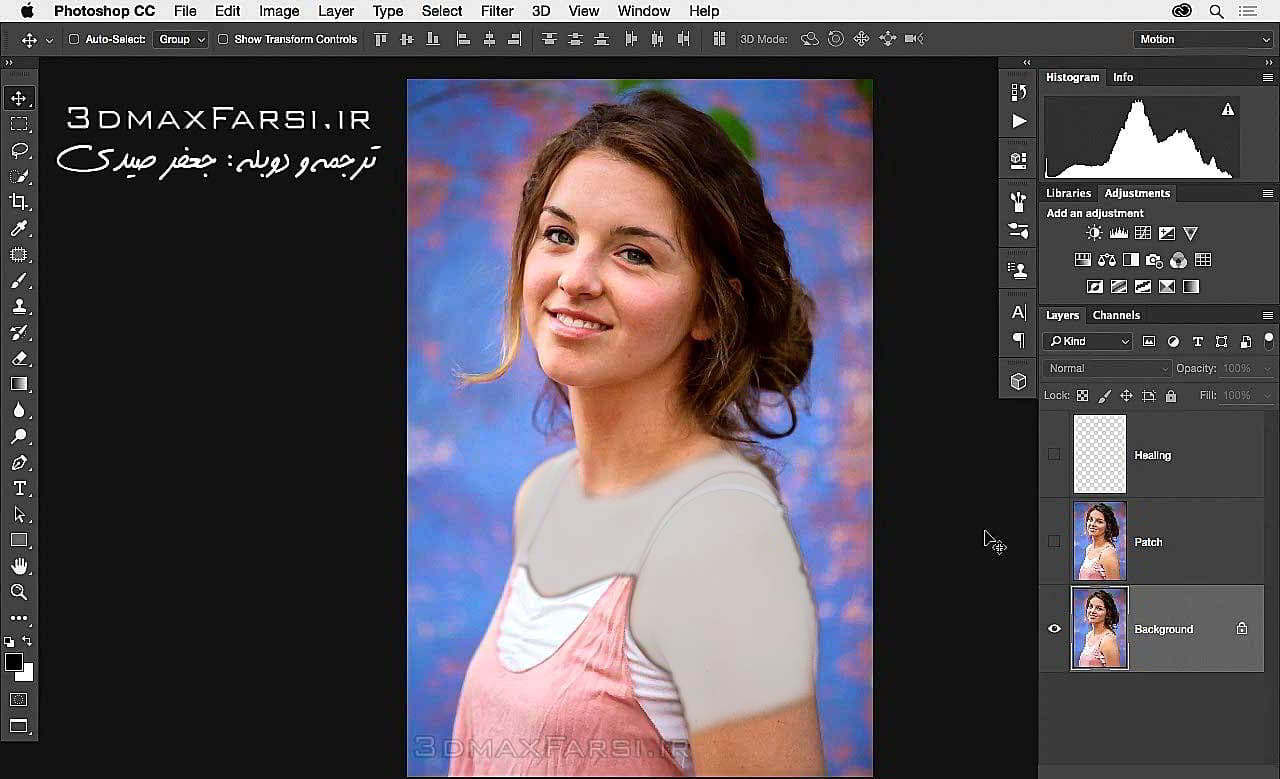
این ویژگی مهم دیفیوزشن کنترل Diffusion control نام دارد که مربوط به بعضی از ابزار های روتوش فتوشاپ مانند : اسپات هیلین براش photoshop spot healing brush ، و ابزار پچ patch و … است. حالا در این آموزش، میخوام این ابزار را با تصویری که در قسمت بالا مشاهده میفرمایید، به شما یاد بدم.در این تمرین، میخوایم سایه های زیر چشم این خانوم را روتوش کنیم و این کار را با ابزار پچ فتوشاپ patch tool photoshop ، شروع میکنم.
همچنین سایر آبشن های آنها، مثلا Normal و content aware را برسی میکنیم که همان طور که میدانید، در ورژن های خیلی قبل از فتوشاپ هم وجود داشت ! و در این آموزش، نحوه کار کردن با آنها و اینکه چه تاثیری در روتوش دارند را برسی میکنیم.
Photoshop video tutorials : Better Healing and retouching with Diffusion control
پخش آنلاین آموزش : 4 دقیقه و 35 ثانیه
سایر آموزش ها و پکیج های حرفه ای ادیت و روتوش فتوشاپ : جعفر صیدی
In this movie, I want to highlight a great new feature which will help you to accomplish even better retouching, whether you are retouching a portrait, a landscape, whatever. And this new feature is called diffusion control. We'll find this control associated with a few of our retouching tools, the spot healing brush, healing brush, and the Patch tool. Let me show you how this works here, with this portrait. With this image, I'll zoom in to 100%. What I want to do with this image is take a look at how I can diminish or get rid of the shadow underneath the eye here. Let's start out by taking a look at how we can do this with the Patch tool. You can see that I have duplicated the background layer and I have this layer which is titled Patch. I'm going to go ahead and turn the visibility of that layer on. Then I'll select the Patch tool. When you choose the Patch tool up top in the Options bar, you have the ability to choose between Content Aware, this works as it did in previous versions of Photoshop, or you can also select Normal..When you select Normal, you'll notice we have a new control over here. This is the new feature, it's a new control for Diffusion. Now, how does this control work, and how does it affect the retouching that we do? Well, let me show you. Let's start off by choosing a Diffusion value of one. Now, the way that we typically use the Patch tool is we make a selection around an area that we want to retouch away, or diminish. In this case, I'll go ahead and make a selection of the wrinkles there, a little bit of the shadow. I have Source selected, so I just need to click and drag this to a new source area, and let go, and wha-la, it's gone. But, yet, maybe it isn't. If we zoom in a little bit, and if I hide the edges of my selection, you can see that the edges are really distinct and defined, and it really doesn't look very good. A lower diffusion value gives you more edge definition. Now, you may be thinking, okay, great, I'm never going to use a low value. Well, that isn't necessarily true, yet, in situations where you want really smooth blending around the edges, we want to use something different. So, what I'm going to do is, rather than use that low value, I'm going to crank this all the way up, make a similar adjustment, just drag this down to the source area, and let go, and then, again, I'm going to go ahead and hide those edges. And, if we look at this, you can see it's much more natural and smooth, and it's just blending together much more effectively. So, the higher the diffusion value, you get a more natural edge when you're working with your Patch tool or other tools as well. Now, with this particular layer, what I might actually do is drop my Opacity down, more realistically, I would go somewhere there. You can see now it just looks really good without a lot of effort. In regards to the new feature, higher diffusion is a softer, more blended together edge. Lower diffusion is one which is more distinct. Now, let me show you this with another tool. Here, I'll click on my topmost layer, and turn on the visibility of that one, and turn off the Patch layer. And, here I want to show you how we can work with the Healing brush. Now, up top we can choose our brush size, of course. And, then next, you notice that we have the ability, all the way over here, to define our Diffusion value. I'm going to do my retouching to the topmost layer, so I have all layers selected here. I've also turned on Align. Now, if we zoom into this area, what we like to do is Option, Alt, click on a good source area, and then paint over the problem, and then let go. And, it did a pretty good job, but if we really look closely at the edges, it's going to be hard for you to see, but there's kind of a defined, or hard edge there. So, rather than using this, with a Diffusion value of one, I'm going to bring this up to seven, and then just start to paint over the area. You're going to see that, all of a sudden, it just looks much more natural and realistic, even at this high of a zoomed in rate. Now, you don't necessarily always need to go all the way up. If you notice that it's bleeding in darkness from surrounding areas, you may want to use a little bit of a lower value, and that way it won't pull that other color in. I'll show you a demo file which will explain this a little bit more in the next movie, but if you ever see it kind of bringing in darkness or brightness, try a lower value, and sometimes that can give you better results. And, again, here, with this one, what I like to do when I am retouching an area like this, is retouch that away, and then decrease my opacity. I don't want it all the way gone, I just want to kind of soften the shadow. I still want to have the overall shape and look of that area of the face. Yet, most importantly, it isn't the retouching, but it's this idea of using this new Diffusion slider, which gives us new control over the way that we start to work with these tools. And, as we've seen so far, this affects how we work with our Patch tool or the Healing brush


داخل هر صفحه، یک ویدئو قرار دارد.اگر دکمه Play رو بزنید، اتوماتیک، نرم افزار دانلود منجر ، پنجره دانلود اش ظاهر شده و میتونید اون کلیپ رو دانلود کنید
یا
آموزش نسخه کامل اش رو از فروشگاه تهیه کنید و روی سیستم خودتون به راحتی تماشا کنید
با سلام
میخواستم ببینم امکان دانلود آموزش های کوتاهی که در سایتتون قرار دارید وجود داره؟
اگه جواب مثبته لینک دانلودش کجاس؟